
The magical
thing about glass fusing is you can work with the same materials for years and
all it takes to fascinate you again is the introduction of a new component. The
round Christmas ornament is far from a unique design. But add a new twist, a
little bling and amazingly you have a delightfully fresh version of an old favorite.
At this hectic
time of year, we’re all looking for fast and flashy projects that make great gifts.
These easy to make ornaments are your ticket to wonderfully productive studio time.
What makes these simple pieces so attractive is the paring of traditional holiday
colors along with lively patterns.
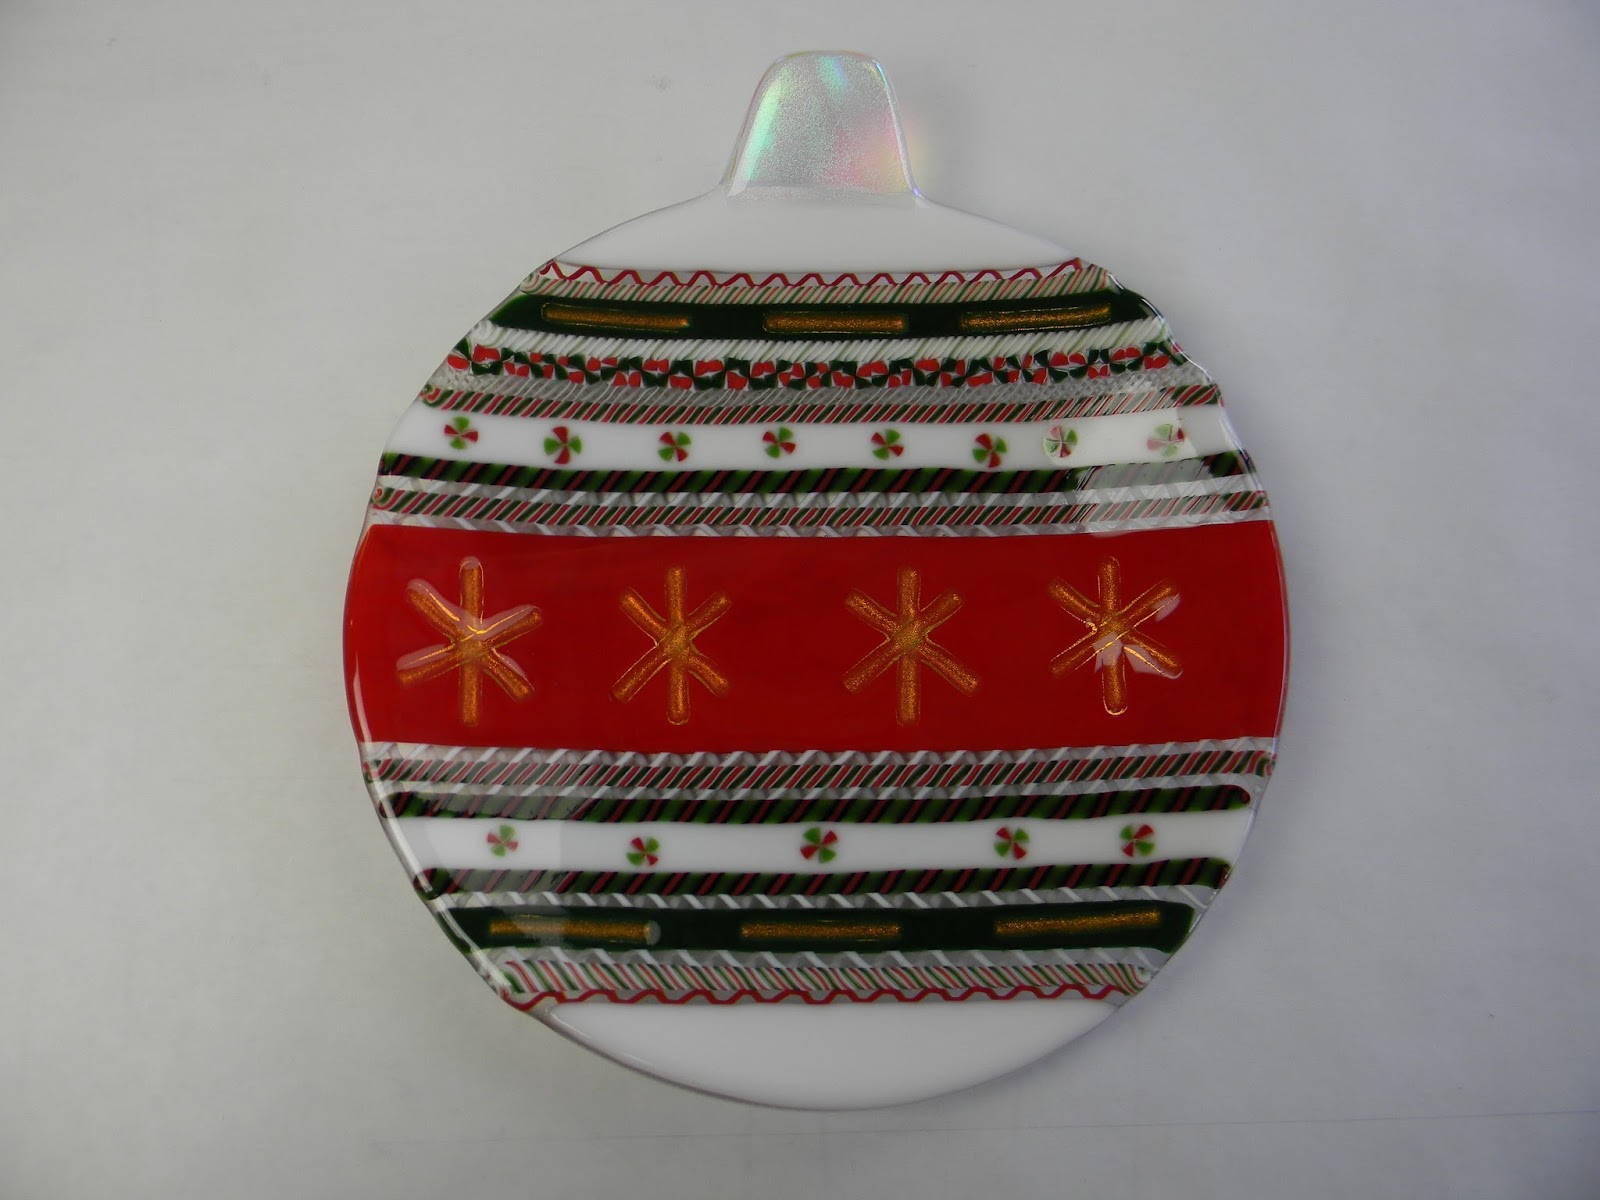
Making the
Ornament Bowl
Begin by
cutting a 9-inch circle of clear glass for the ornament base. Cut 2 clear pieces
of glass to represent the bail of the ornament. Select your murrine and cut it
into 1/8-inch-long bits with mosaic nippers. Choose your holiday colors and cut
them into strips. Arrange the strips on the clear base. Separate the cut strips
with twisted cane. For added interest, include a strip of murrine.

Then, just
for fun, rearrange your materials. Try different combinations until you have a
pleasing pattern. I love this spontaneous type of assembly as it always produces
a more dynamic design than I originally imagined.
Using a 9-inch
round paper pattern as a guide, draw the circle shape on the strips and cane
with a marker. Cut the strips and cane to fit neatly on the clear base glass.
Cut clear dichroic to represent the bail of the ornament.
Cut narrow
strips of dichroic on clear. Arrange the dichroic strips on the wide band of color
to make the snowflakes. Be sure the dichroic coating side is down so it won’t scratch
when the bowl is used.

Place the
assembled glass in the kiln on a primed or shelf paper lined kiln shelf. Stack the
2 clear bails beside the circle. Overlap the white and the clear bails with the
dichroic bail to bridge the parts when fused.

Making the
Dichroic Ornaments
I plan to
use these little beauties as festive spoon rests in the kitchen. The dichroic
coating is fragile and will scratch if not protected by clear glass. When making
functional art with dichroic glass, I assemble the projects differently. Unlike
the first ornament, which was built on a clear base, the base of these small decorations
will be made up of pieces. The pieces will then be capped with a single piece
of clear glass to amp up the dichroic colors and protect the coating from
scratches.
Begin by cutting
4-inch circles out of clear glass. Cut 2 bails for each of the ornaments out of
clear glass. Set the circles and bails aside. Cut a fun assortment of 4-inch
squares of dichroic on black into strips. Rearrange the strips to make four
unique ornament designs. Add a few twisted canes for a lacy effect. Turn any
textured glass strips over. Using the clear circles as a guide, trace the circle
shape on the back of the dichroic strips with a silver marker. Cut the glass and
cane to match the circle. Turn the cut glass over and rearrange the strips and
cane. Cut a bail for each ornament out of dichroic on clear.
Place the
dichroic and cane layer in the kiln on a primed or shelf paper lined kiln
shelf. Cap the dichroic glass with the 4-inch clear glass circles. Stack the 2
clear bails beside the glass. Overlap the clear cap and
the clear bails with the dichroic bail to bridge the parts when fused.
Full fuse all
five ornaments using the guide below.

If any of the
circles are uneven, grind the edges as needed to improve the shapes.

Place the fused
glass in slumping molds. Slump using the guide below.


I love including
functional art in everyday life. And the kitchen, being the hub of family activity
that it is, is a great place to enjoy personal, hand-made holiday decorations.
NEW Check out the Glitzy Ornament Bowl
Video!
https://www.youtube.com/watch?v=oNFPvN_uYsE
Enjoy!
Happy Holidays!
Lisa
Follow my
blog for more tips and tricks!
Artist
Website www.LisaVogt.net
YouTube http://www.youtube.com/watch?v=dhOifd7wukk
Facebook www.Facebook.com/LisaJVogt
YouTube http://www.youtube.com/watch?v=dhOifd7wukk
Facebook www.Facebook.com/LisaJVogt
Author
Website https://lisajvogtcom.wordpress.com/
Fusing
Guide
Segment
1: Ramp 300 F/hr to 1300 and hold 30 min.
Segment
2: Ramp 500F/hr to 1465 and hold 10 min.
Segment
3: Ramp 9999(AFAP*) to 960 and hold 40 min.
Segment
4: Cool to room temperature.
*As
fast as possible
Slumping
Guide
Segment
1: Ramp 300 F/hr to 1265 and hold 10 min.
Segment
2: Ramp 9999(AFAP*) to 960 and hold 40 min.
Segment
3: Cool to room temperature.
*As
fast as possible
NOTE: Kilns fire differently. Test fire these guides in
your kiln, adjust as needed.

Here’s the glass I used to
make these ornaments.
Glitzy Ornament Bowl, 9 Inch Round
Oceanside
Glasstile Spectrum and Uroboros Glass - System 96®
Clear, 100SF, 1 Sq. Ft. for Base
White, 200SF, ½ Sq. Ft for Design
Dark Green, 220-76SF, ¼ Sq. Ft for Design
Flame 60-602-96, ½ Sq. Ft. for Design
Twisted
Cane, Assorted colors, 17 for Design
Murine,
Red, White & Green, 1 for Design
CBS
Dichroic on Clear, Scrap

Glitzy Ornament Dishes, 4
Inch Round
CBS Dichroic on Black
Assorted
colors, 4 – 4 Inch x 4 Inch for Base Layer
Clear,
100 SF, 1 Sq. Ft for Second Layer
Ceramic Slumping Molds
1 – 10 Inch x 10 Inch Square
4 – 4 Inch x 4 Inch, Square
Upcoming Events

Let’s get together and fuse with frit! It’s
LIVE! I come to YOU!
Reshape the way you slump
and drape glass!
Creative Slumping Webinar,
January 18, 2018

Now registering!
Advanced Glass Fusing Workshop
February 6 – 9, 2018
Wesley Chapel, Florida
4-Day, Hands-on
You’ll love the creative momentum you
gain from working four consecutive days.
Exceed your expectations! This workshop
is ideal for ambitious glass fusers determined to go bigger and explore more
in-depth kiln forming techniques! Join me in this comprehensive, 4-day workshop
and enjoy, one-on-one instruction, step-by-step guidance to develop your own
design style and an individualized project program - make what inspires YOU!
Check out the New
Advanced Fusing Workshop video here


