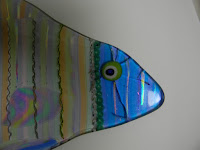
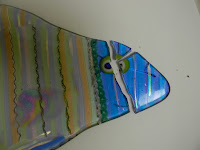
 |
| Failed drop out mold. |
Eternal
optimists, those of us fitted with rose colored glasses, have a hard time
giving up on failed projects. We’re artists. It’s in our nature to see the
potential beauty in raw materials. So, when something goes wrong we want to fix
it or repurpose it, rather than abandon it.
I’m here to
tell you sometimes, when the signs are there, it’s okay to take a hammer to
your art and smash it! As a matter of fact, it’s therapeutic, liberating and
flat out FUN to destroy a rebellious creation.
What are the
signs that you should abandon a piece of artwork?
A story tells
it best. I was working on a commission, a wall sculpture with 14 circles. All
the fusing compatible sheet glass came in a single crate, directly from the
manufacturer. The glass circles were fired in the same kiln, using the same,
trusted firing programs. One of the 28” circles broke for no reason. I ruled
out glass incompatibility and firing speed issues because the larger circles
came out beautifully.
It was a lot of
material to waste. Rather than throw it away, I pushed the two halves back
together and re-fired them. It worked. When I opened the kiln, I was happy to
see the circle was intact and the glass surface looked smooth and shiny. I left
the kiln open and worked on cutting another circle. Later that afternoon, I
noticed that the circle was cracked again! I was the only one in the studio all
day. It was a mystery as to why the glass broke.
 |
| Still struggling with that drop out mold. |
Stubborn and
tenacious, I wasn’t going to give up that easily. I stacked the two broken
pieces on a layer of clear and re-fired the glass. This time the ramp up was even
slower to account for the increased mass and to minimize the appearance of a
scar where the two pieces fit back together. It worked! The fused glass looked
great.
It never
happened before, and has not happened since, knock on wood. Without warning and
without cause, the huge lid on my clamshell kiln fell and slammed shut. It was
as unexpected and frightening as a clap of thunder on a sunny day. I jumped out
of my skin. When I recovered and opened the kiln, the circle was split down the
middle.
 |
| Success! |
That was
defiantly a sign. I firmly believe forces bigger than us are at work while
we’re at play. And for whatever grand, unknown reason, deemed that fused glass
piece undesirable. After a cool-down walk and a stiff drink, I dumped the
broken glass in the trash and made a new one, which is still in place ten years
later.
Fortunately, I’ve
had very few kiln malfunctions.
Since then I’ve
had two similar incidents. In both cases I was experimenting with new
techniques. I repeatedly fired pieces three and four times after they broke
during fusing to salvage the materials and gain authority over the technique.
Glacier. I had
the title and a mental image of what I wanted this bowl to look like. It was
freeform in shape. The art I imagined was deep blue in the center and gradually
transitioned to clear around a lacy rim. Picture ice crystals growing from a
thick slab of ice.
I used casting
rocks to make the piece as their angular shapes added to the organic feel and
growth of the piece. The piece broke during the fusing stage. No problem. I
smashed it up with a hammer, reassembled it and re-fired it slower. It came out
great. Then the darn thing cracked like and egg during slumping. Break out the
hammer again. Fuse it again. Success. Yay!
During the
final firing, while slumping the glass my most reliable kiln overfired. It
hadn’t misfired before. The results were disastrous. In place of the lacy bowl
I expected was a solid three-inch-thick puddle that resembled a frozen duck
pond instead of a delicate freeform vessel.
In this case, I
abandoned the inconsistent material, the casting rocks and started over. This
time I applied the innovative fabrication ideas I’d learned in the process to
sheet glass with great success. I like the resulting piece of art. But it
doesn’t have the born-of-nature, angular traits I wanted. Nor does it satisfy
my original artistic purpose of building with new materials. And so, this
project remains on the revisit list.
Another sign to
abandon a problematic project is obvious incompatibility. On occasion, I use
different fusible components together to create unique projects. These
materials have been collected in my studio over the course of years and
therefore compatibility issues arise. I’ve also found that certain colors are
more apt to have compatibility problems than others.
How to identify
incompatibility issues.
Incompatibility issues are easy to identify. Random cranks will form around the incompatible glass. The project will break from the inside out. You can cut the incompatible parts out and make something new or trash the entire piece.
Once a piece of
glass shows itself to be incompatible with the rest, I don’t trust the project
anymore and get rid of it.
Eruptions can
ruin your day.
Have you ever
had a bubble form between your fused glass and the shelf? Yeah, me too. It
stinks. The bubble forms when firing too fast on a very smooth surface like a
primed kiln shelf or Thinfire fiber
paper.
As the glass is
heated the rim becomes soft first. The soft glass seals to the shelf like a
suction cup. Air becomes trapped. As the trapped air is heated it expands and
forms a bubble. Sometimes the bubble is paper thin. Sometimes it breaks during
firing and heals leaving a hole.
The disappointing
part is the bubble usually distorts the design. You can re-fire the glass but
the distortion will remain. Of course, you can pop the bubble and fill the
hole. But the original design will suffer. The best solution is to avoid bubbles
in the first place. I’ve included the firing guide I use to eliminate these
types of bubbles below.
I generally
toss projects with eruptions rather than waste time and resources on something
that doesn’t meet my standards of quality.
What happens to
my ugly creations?
The super bad pieces are dumpster frisbees. Let me tell you, that glass can fly. The loosely called, art pieces end up in friend’s houses. Friends like to adopt the misfits because they’re neat, weird, flops with some cool characteristic that makes them fun conversation pieces. The others, the somewhat interesting, unexpected turn-outs become part of the, “artist’s private collection.” This is a fancy term for dust collectors hidden on the back of the bottom shelf in the gallery room.
What I learned.
As frustrating
as failure is, it pales in comparison to the thrill of success. I won’t stop
trying new techniques or using unconventional materials. But there is a time to
take a different scenic route and that’s the beauty of creating, there are
always new paths to cut.
Never give up!
Lisa
Here are my firing guides.
Notice the hold
at 1300 degrees in the Fuse program. This hold will eliminate bubbles by
allowing the entire project to soften uniformly.
Firing Guides are for
projects 12” or smaller, 3 layers of glass plus accent.
Fuse: Rate Temp Hold
1
300 1300 60*
2 300 1465 10
3 500 960 40
Let
cool to room temperature.
*This
hold prevents bubbles from forming between the glass and the kiln shelf.
Slump: Rate Temp Hold
1 300 1265 10
2 500 960 40
Let
cool to room temperature.
Tack: Rate Temp Hold
1 300 1365 10
2 500 960 40
Let
cool to room temperature.
**These firing guides are for System 96.
They work equally as well with other COEs.
***Kilns
fire differently. Test fire your kiln and make adjustments as needed.
Let’s get
together and fuse glass!
I experiment so you don’t have to. Want more
innovative tips, tricks and brand-new project ideas? Join me for this exciting
new upcoming webinar. I look forward to seeing YOU there!
NEW
Fusing for the
Adventurous Webinar
September
5, 20147
NEW
Fusing for the
Adventurous Webinar
September
7, 2017
Fusing with Frit Webinar
October
26, 2017
Creative Slumping Webinar
January
18, 2018
Advanced Glass Fusing Workshop
February
6 – 9, 2018
4-Days,
Hands-on, Wesley Chapel, FL
Register here http://www.lisavogt.net/products.aspx?id=477
5 Reasons Why YOU Will LOVE this
Workshop!
1 One-on-one instruction
2 Step-by-step guidance to develop your
own design style
3 Individualized project programs - make
what inspires YOU
4 Four full days of hands-on creating
and fusing
5 Unlimited possibilities


Sometimes failures can actually be pretty though. I have seen strange results and they actually can be eye-catching. I did toss out those with cracks though, cracks are big problems.
ReplyDelete