
My favorite thing about glass fusing is its limitless possibilities. Beyond the basics, there are countless ways to work with this medium and get surprisingly unique results every time. There’s always something new to try and learn.
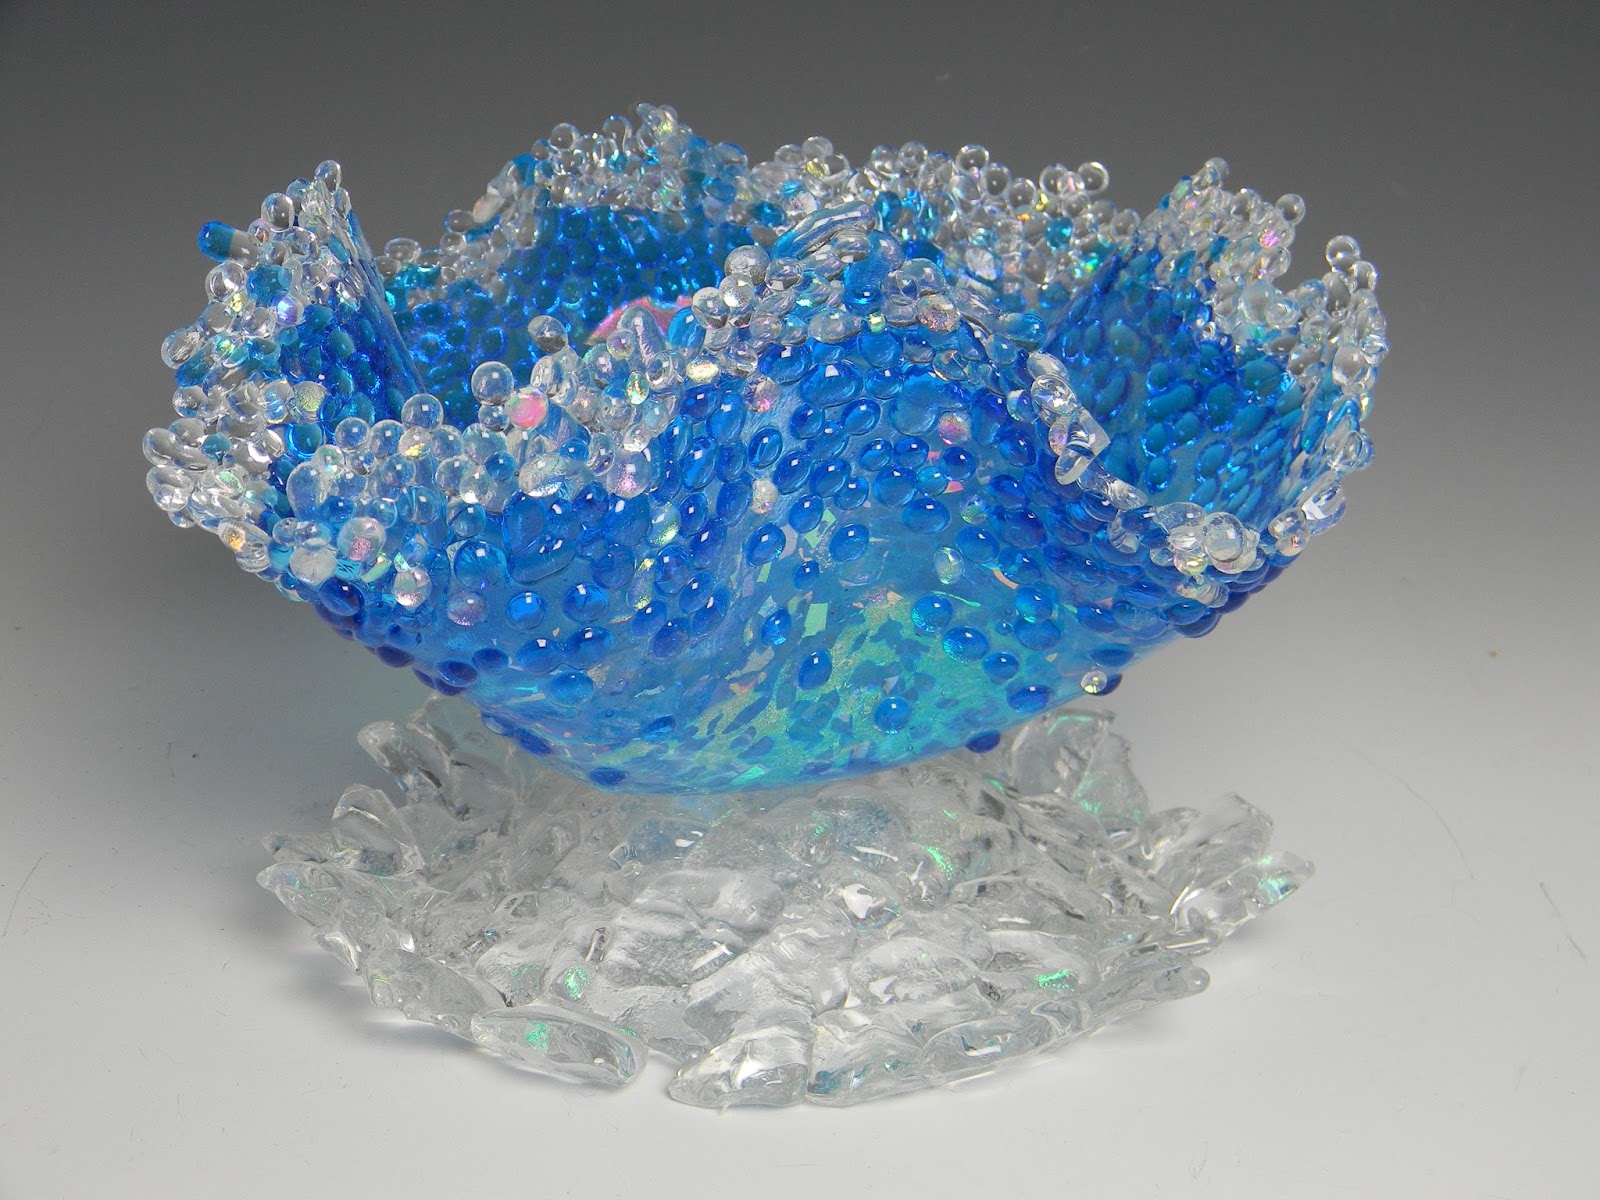
Another thing I love about glass is the three-dimensional aspect. We have the power to change the shape of our art and take it from flat to fabulous. Drop out molds are great props you can use to express your artistic flare in exciting, new creative ways.
What makes drop molds different?
When fused glass is slumped into a typical mold, we retain the original design unchanged but now with a gentle three-dimensional shape. Whereas the process of reshaping glass by allowing it to fall through the hole in a drop out ring changes and adds to the visual features of the design. As the glass drops through the ring the design elements blend and stretch which gives the illusion of movement in the finished project.
As the glass falls through the mold it stretches. Because dropping glass adds detail to the pattern, I’ve found that when it comes to the vase design less is more. Keep the design simple. An over complicated pattern makes the vase look clumsy and heavy instead of graceful and light.

Drop Out Vase How-to
Drop-out-mold
vases are tricky. Every kiln fires differently. The type of glass used and the
way the project is assembled both affect the way the glass falls through the
hole. Taking detailed notes is especially important if you want consistent
results time-after-time.
To make the glass.
Cut five (5) 7-inch glass circles. Vary the design on the layers. Stack the 5 layers in the kiln on a primed or fiber covered shelf. Wrap the stacked glass with Thin Fire fiber paper and 1/8” thick fiber paper to maintain the desired thickness and shape during the fusing process. Hold the fiber paper ring in place with kiln posts.
Fire to a full fuse temperature using the guide below.

To Make the glass base and riser.
Base: Cut two 4-inch circles, one black glass, one clear dichroic glass. Stack and full fuse.
Riser: Cut two 1 ½ inch circles out of clear glass. Stack and full fuse.
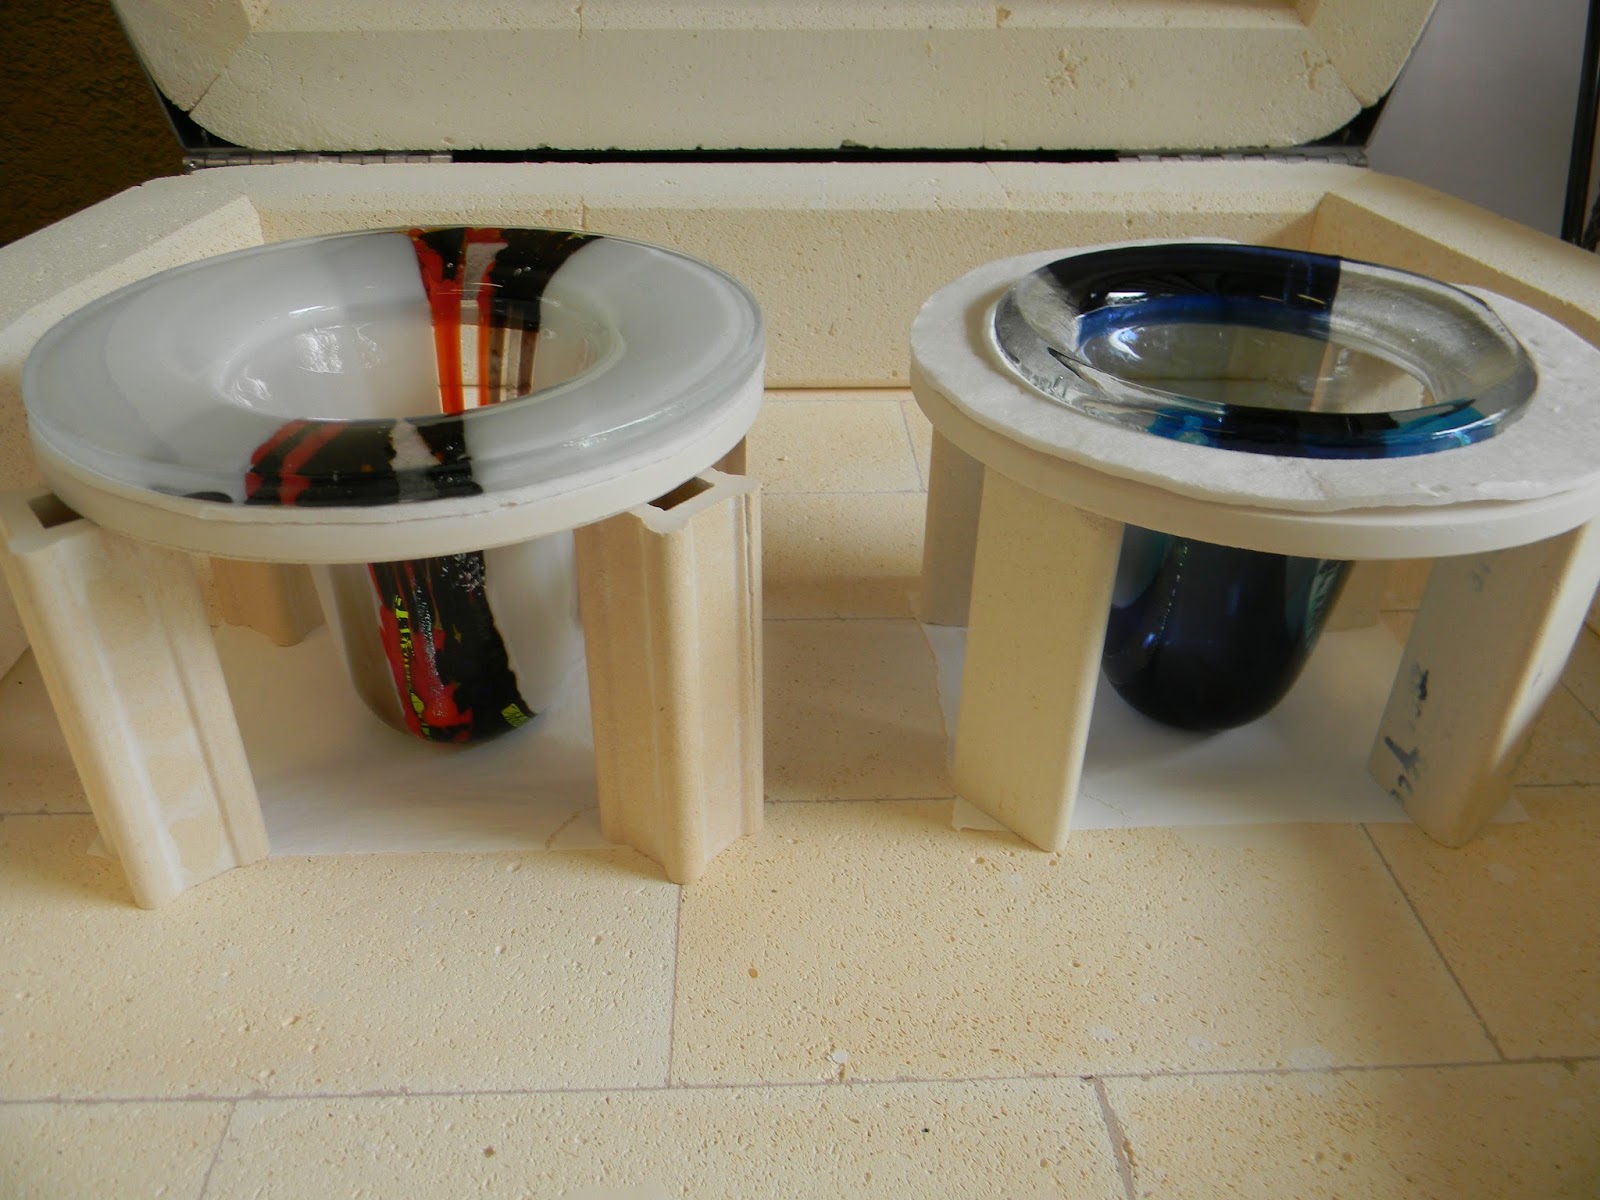
Drop out mold set up.
The round, ceramic drop out mold is 9-inch-wide with a 5-inch-wide hole. Cover the mold top with 1/8-inch thick fiber paper. This keeps the glass from slipping off the mold as it drops. If handled carefully, the fiber paper can be reused over and over.
Support the mold with four, 5-inch-tall kiln posts. Cover the kiln bottom, below the glass with fiber paper.
Fire the glass to drop it through the mold using the firing guide below.
Kilns fire differently.
Test fire these guides. Take notes and make adjustments as
needed.
Firing
Guide – Full Fuse
Segment
Rate
Temp/Degrees
Hold/ Minutes
1
300
1300
60*
2
300
1465
10
3
9999**
960
40
4
500
800
10
5
Let cool to room temperature
*This
hold prevents bubbles from forming between the glass and kiln shelf.
**As
fast as possible.
Drop
Ring
Segment
Rate
Temp/Degrees Hold/Minutes
1
500
1200
30
2
200
1300
60***
***Peek
at 30 minutes and again at 45 minutes to monitor the drop.
When
the glass touches the fiber paper lined kiln bottom go to the next segment.
3
Flash Vent
1000
0
4
9999*
960
40
5
500
800
10
6
Let cool to room temperature.
*9999,
As fast as possible.
**These
firing guides are for System 96. They work equally as well with other COEs

Cutting the rim.
Cut
the rim off with the 2-inch EverRun Sintered Diamond Slitter and Dremel. Grind
and polish the rim. Glue the vase on the riser and base with E6000
adhesive.


Supplies & Materials
5 glass circles cut to 7-inch across
9-inch round ceramic drop out ring
with a 5 inch hole
5-inch kiln posts
1/8-inch thick fiber paper
Thin Fire fiber paper
Tools & Materials
2-inch EverRun Sintered Diamond
Slitter
Available at: His Glassworks www.hisglassworks.com
Variable speed Dremel with flexible
shaft
Water source
Holding Tray
Grinder


See
how this vase is made on YouTube
Excerpt from Creative Slumping Webinar
Webinars
are a wonderful way to stay connected to other fusers and keep the creative
flow strong between hands-on workshops. In this webinar, I show you how to use
materials you likely already have in innovative ways to make new and unique
shapes. You’ll be amazed at how simple combinations can transform ordinary
shapes into sculptural works of art. I hope you’ll join me for this fun and
informative live event.

Creative Slumping Webinar, Thursday,
November 15, 2018
Register
here: https://www.glasspatterns.com/en/glass-patterns-quarterly-store/product/1240-creative-slumping-with-lisa-vogt-november-15-2018.html
Wherever you are in your
artistic journey, you’re doing a great job! Bravo!
Happy fusing!
Lisa
Lisa
Follow my
blog for more tips and tricks!
Artist
Website www.LisaVogt.net
YouTube http://www.youtube.com/watch?v=dhOifd7wukk
Facebook www.Facebook.com/LisaJVogt
YouTube http://www.youtube.com/watch?v=dhOifd7wukk
Facebook www.Facebook.com/LisaJVogt
Author
Website https://lisajvogtcom.wordpress.com/
Twitter
https://twitter.com/lisajvogt

Want
more ideas? Join me in this fun and informative LIVE event!
Creative Slumping Webinar
Thursday,
November 15, 2018
Register
here: https://www.glasspatterns.com/en/glass-patterns-quarterly-store/product/1240-creative-slumping-with-lisa-vogt-november-15-2018.html
Back by popular demand! Join me for my upcoming
Creative Slumping Webinar. In this detailed Webinar, I’ll reshape the way you
slump and drape glass. See how thinking outside the box and using readymade
molds in new ways offers numerous and exciting opportunities to produce unique
forms. You'll also learn how to make your own graceful, free-form shaped molds
from readily available materials with no laborious measuring or messy mixes
needed.
Plus, there’s more...
We’ll take it one step further, I’ll show you how to use these different approaches, in combination, to transform ordinary projects into inspiring, sculptural pieces of art!
We’ll take it one step further, I’ll show you how to use these different approaches, in combination, to transform ordinary projects into inspiring, sculptural pieces of art!

New for 2019
Are you a lifelong learner?
As a life-long learner myself,
I know it sometimes takes a change of scenery, a challenging new educational
experience and the encouragement of an experienced instructor to advance my
skills and help me grow. 
Are you ready to grow? This class is for you!
Now registering.
Advanced
Glass Fusing, February 5-8, 2019
4-Days,
Hands-on Workshop
My
private studio, Wesley Chapel, FL
Register here: http://www.lisavogt.net/products.aspx?id=480Striking glass work is the result of combining multiple, advanced techniques in innovative ways to produce exceptional art. In this comprehensive, 4-day workshop, I’ll show you how to combine different methods of assembly to make original, fused glass art that’ll make you standout. Techniques include: my Free-Flow, combing, weaving, embossing, advanced layering, designing artistic shapes, plus creative and deep slumping. You’ll also learn how to change the shape of thick, fused glass with various saws, slitters and drills. In addition, you’ll learn kiln operation plus how to make unique display stands.

Learn at home at your own pace. Instructional
Videos are here!
Available here: http://www.lisavogt.net/shop.aspx?id=40

Check out my writer’s blog.
LOVELY! I wish I could turn back time and join your class. I'm a Quad now but in the 80's, I dabbled in stained glass and my how far it's come. Your things are just amazing. Would love to see you in action. Sara May
ReplyDelete