Hey Glass Friends, I could use your help.
I'm beginning a new, exciting project and would like to
know if you'd like to hear about my journey in my blog? I'm going to design and
build a new artist website for my glass business.
Don’t be fooled, I’m no techie. But I am stubborn and
driven. I’m fired up for a new challenge and excited about the opportunity to
learn new skills.
 |
| Photo shoot time. |
Are you with me?
Change isn’t easy. But there comes a time when you realize
that doing things the same old way may be getting the job done, but there’s no
spark of excitement in it anymore. That’s when you know it’s time to reevaluate
your process and update your tools to improve your performance. My website is a
tool like any other.
It’s my intention to build a new website that reflects who
I am now and the artistic growth I’ve enjoyed over the past years. The new site
will be infused with positive energy and inspiring content that’ll help us grow
as artists and be more creative, productive people.
I’m reinventing myself. Just like Madonna. I have the power
to do whatever I want and be whoever I want to be. And it’s time to create a
new, website that mirrors that forward momentum and energy. I hope to build a
site that makes it easier to bring you education, inspiration and the motivation
you need to be your best creative self.
Streamlining my work load.
I’m really thrilled about having more control over the
content on my new website and being able to update images and information more
frequently. There’s always something new to share. Soon, I’ll be able to show
and tell you about them right away. I’m also looking forward to having all of
my different extensions: blog, email, classes, videos etc. all in one
convenient, easily accessible place.
 |
| Here I'm testing different settings in search of backgrounds that enhance my art. I like the textures and color contrast in this one. |
Now on to the journey.
Research is key to finding the right direction to take a
new website. I’ve been reading articles about the current trends for websites
and online stores. So far, I’ve learned that new websites are using neutral,
calming color schemes. They are also using only a few soft colors sometimes as
few as one or two colors. This may be the first rule I break.
Another trend is the use of a lot of white space and keep
the pages clean and clutter free. Navigation tools, site maps and menus are prominent
and easy to use. Less is more, appears to be the dominant message.
Also, effective sites are designed for mobile-first users.
They display well on smart phones and tablets. Most users visit sites and shop
on portable devises while they’re on the go. The content is displayed
vertically one item on top of the other so visitors can scroll up or down on
small, narrow screens.
That’s the extent of the design information I’ve collected
thus far.
 |
| I like the soft background pattern and tiny red highlights. |
Nuts and Bolts
Before even thinking about uploading material to a new
website I’m collecting the basic content that’ll be the backbone of the site. I
designated a folder on my computer to the new website. That way when I’m ready
to add content, everything I need will be in one easy to find location.
In the folder I have my artist bio and contact information.
Write
a great artist bio. I have an
additional blurb that will appear in the ABOUT section. I also have my sales
policy written out. There are a couple of profile pictures; one image is a nice
head shot and the other one shows me working in my studio. I have cover images
and descriptions of my instructional videos and design books. Plus, I have pictures
of some of my favorite pieces of glass art to give my website a personal touch.
 |
| This stone landscape and filtered light add depth to the image. |
Next up, I’m going to photograph new pieces of art that
I’ll sell on the website. Photographing
your art to sell. Then I’ll give each piece a clever name and write a brief,
yet catchy description. For me, writing the descriptions is one of the hardest
parts of the whole process. It’s so hard to make each piece sound special,
different and unique when I love them all equally.
 |
| Quality control had some helpful advice. |
Do you need a website?
That depends on you. First, define your goals.
For hobbyists, a website is a great place to showcase your
work and take your craft to a higher level of sophistication.
For selling artists a website is essential. It’s your business
card. It’s the most efficient way for people to find and contact you. A website
builds trust in potential customers. It shows you’re a legitimate business
owner who’s serious about the quality and creativity of your work.
Your site doesn’t have to be fancy or expensive to work. There
are plenty of really good, free hosting options out there. You can have a
simple, attractive and effective website with minimal effort.
Remember less is more. Keep it clean and simple and you’ll
be successful. I believe in you. You can do it.
If you enjoyed this post let me know and I’ll share more on
this topic. Let me hear from you, like
this post and leave a comment.
Happy fusing!
Lisa
Lisa
Follow my
blog for more tips and tricks!
Artist
Website www.LisaVogt.net
YouTube http://www.youtube.com/watch?v=dhOifd7wukk
Facebook www.Facebook.com/LisaJVogt
YouTube http://www.youtube.com/watch?v=dhOifd7wukk
Facebook www.Facebook.com/LisaJVogt
Author
Website https://lisajvogtcom.wordpress.com/
Twitter
https://twitter.com/lisajvogt
Welcome
Life-Long Learners
Upcoming
Webinar
Let’s get
together and fuse glass!

Make a Fused Glass Sink Webinar
May 14, 2019
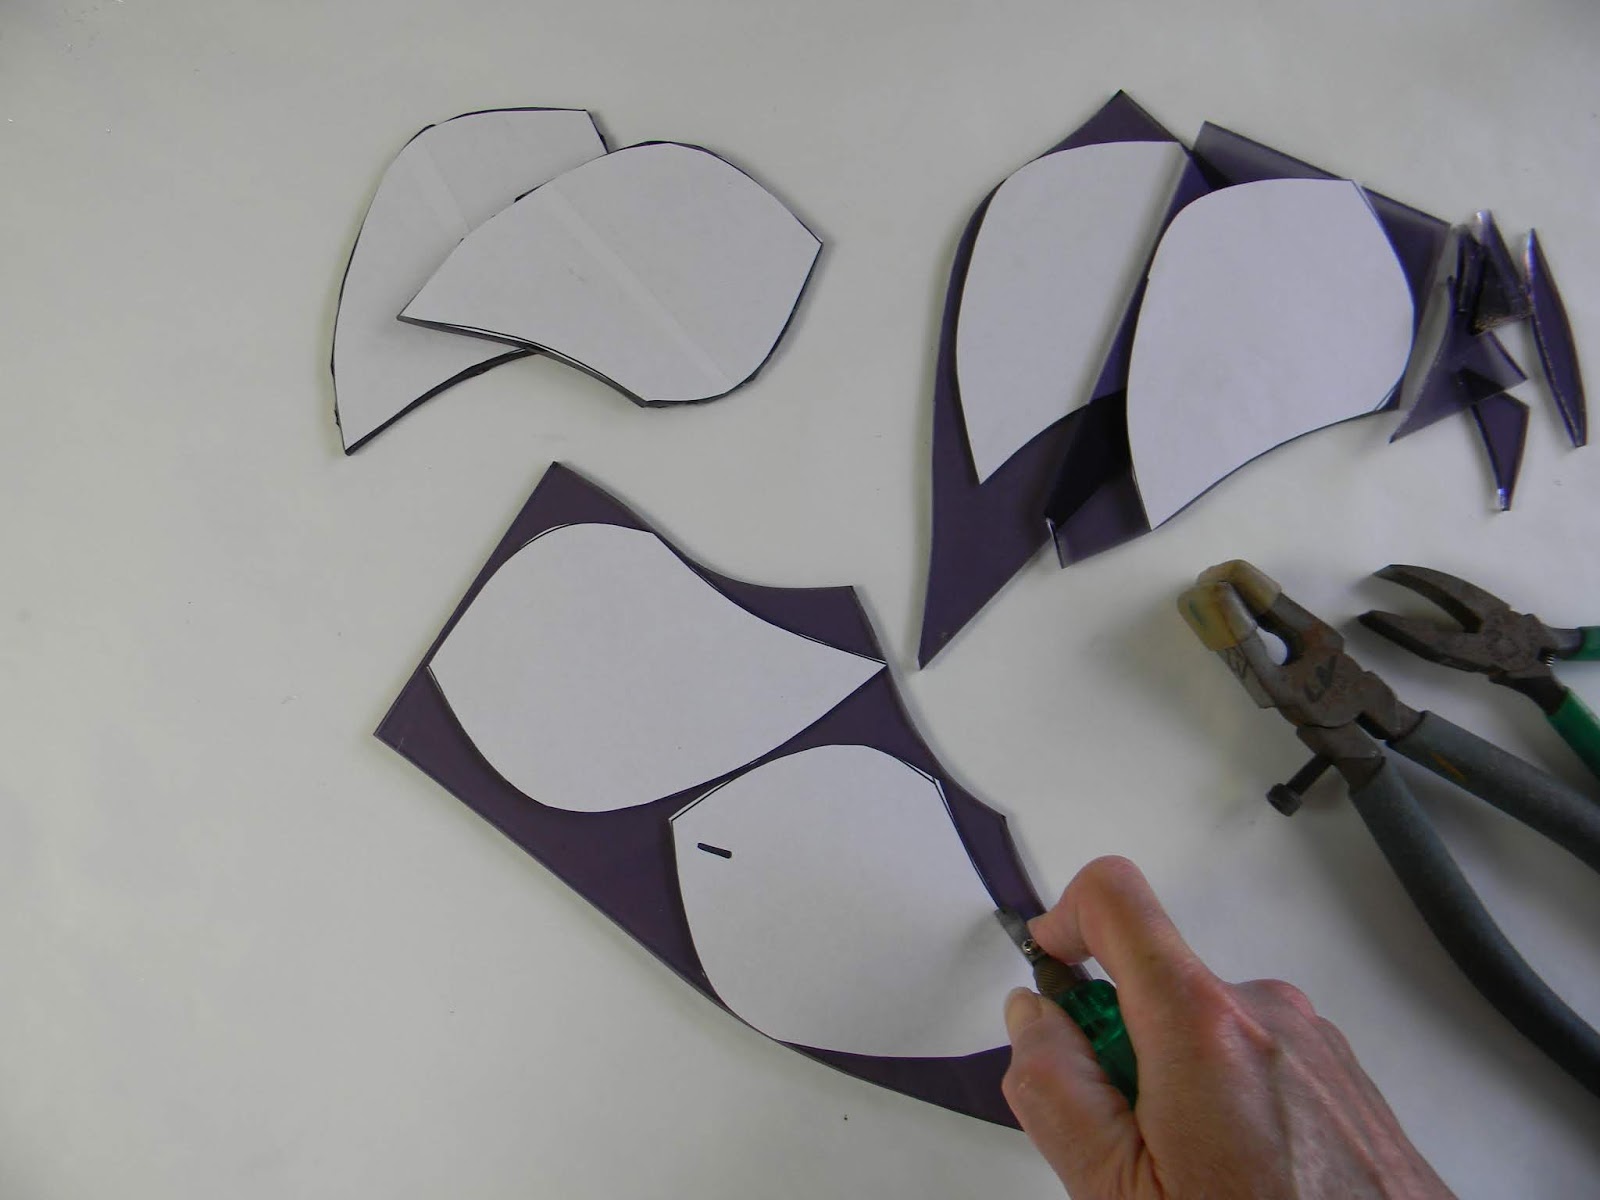
In this
comprehensive webinar, I’ll guide you step-by-step through the time-tested
processes I use to make large-scale, functional bowls.
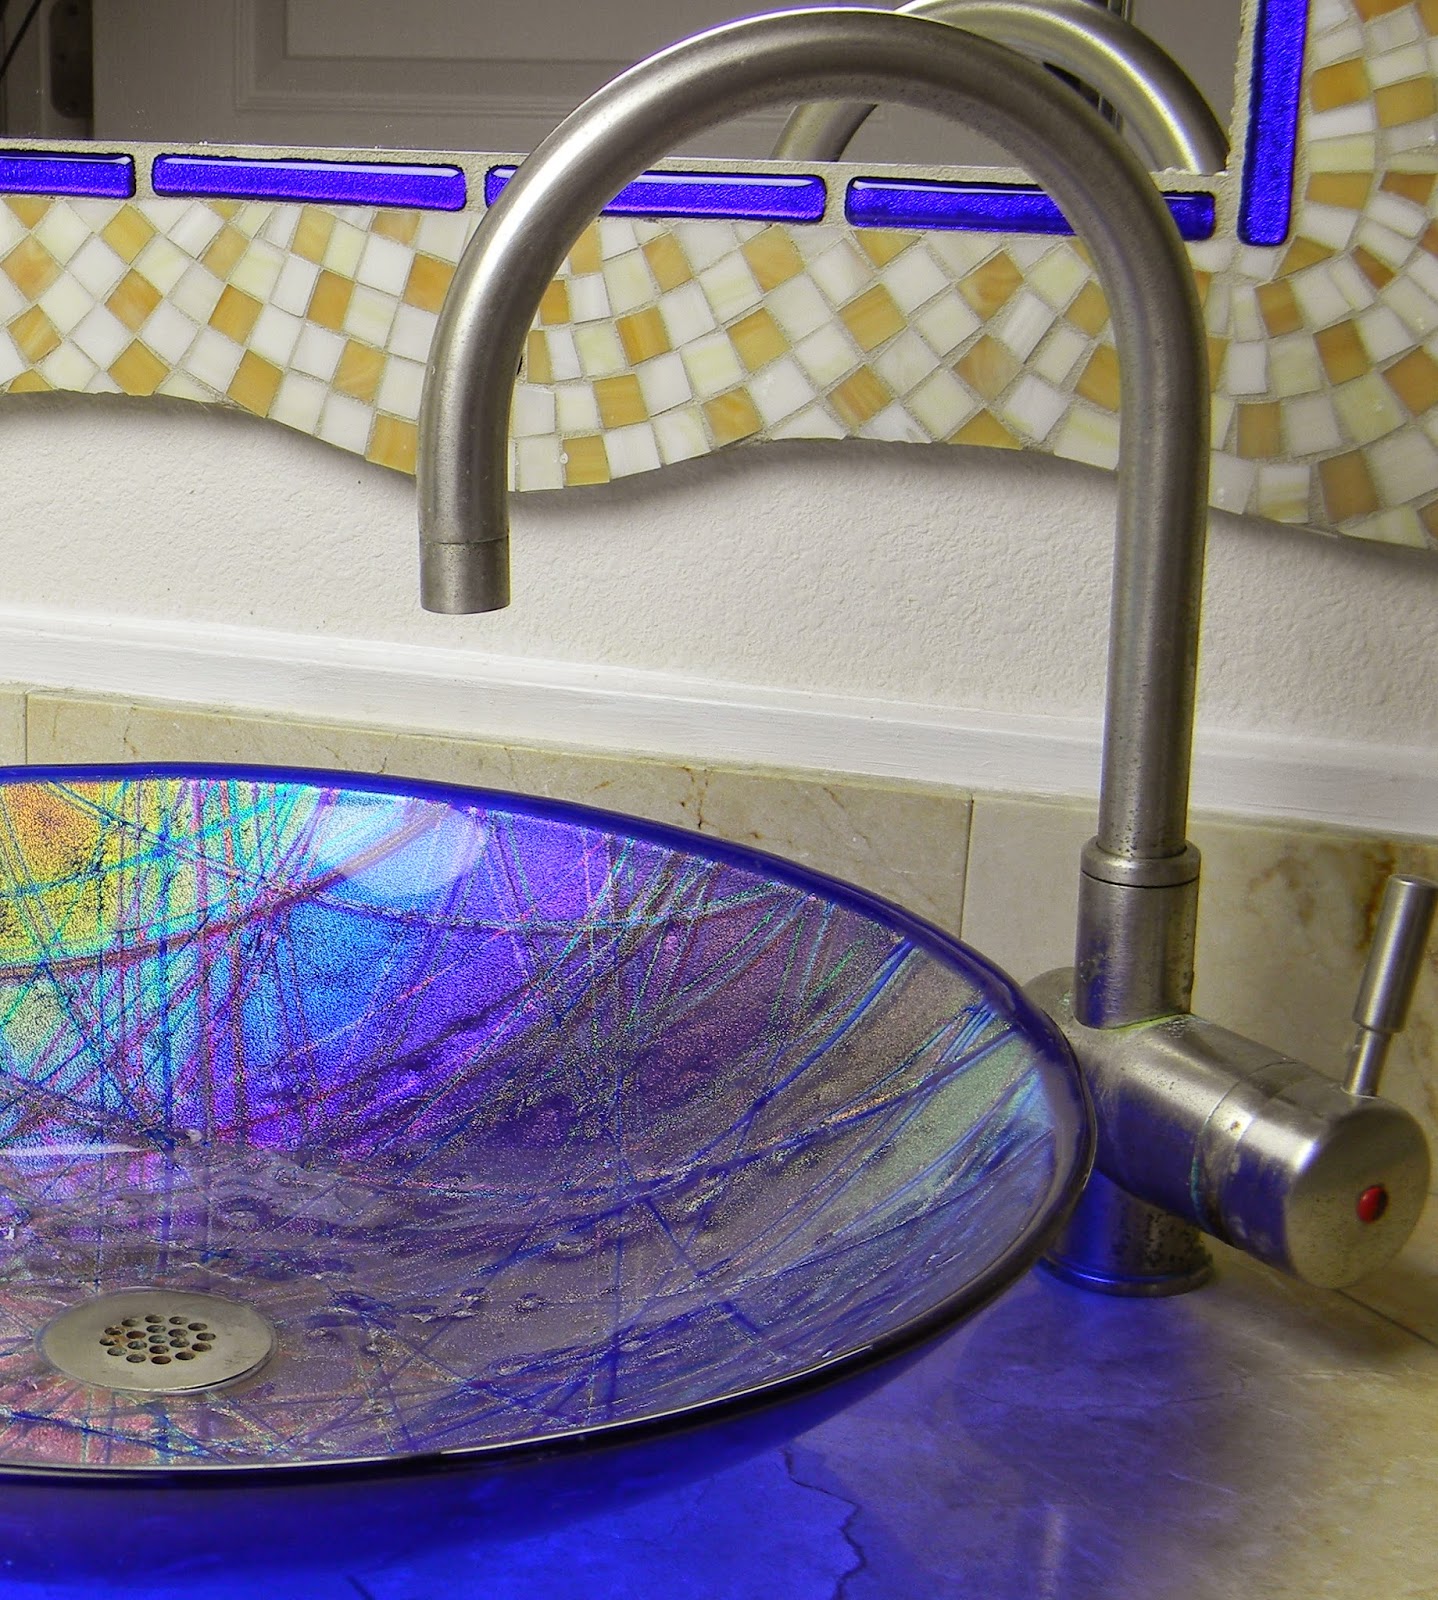
You'll learn safe handling techniques for cutting oversized circles, how to fuse and slump thick pieces to retain consistent bowl height, plus trade-secrets for worry free drilling. In addition, I’ll demonstrate how to make a glittering dichroic sink. I’ll also show you how to make a cast glass sink from nipped glass pieces, dichroic bits and frit.
In addition to fabrication know-how, you'll receive a complete supply list, specifics on kiln requirements, source information for the slumping mold and drill kit, as well as helpful installation tips.
With all the professional tricks revealed, you'll gain the confidence and knowledge needed to make your own dazzling beauty.
Wait...there's more!
You'll be guided through the various cold-working steps I use to finish the cast glass sink edge to a glamorous, professional, quality polish.


NEW Workshop Announcement - Now Registering!
Sculptural
Fused Glass, 4-Day, Hands-on Workshop
October
15-18, 2019
Join me for this intense workshop
held in my private studio in Wesley Chapel, Florida. Class size is limited to 4.
Sculptural fused glass is the creation of three-dimensional forms that rise above a flat plane. Artists create 3-D works by using multiple methods and techniques with complete freedom of materials and process.
In this class, you’ll push the
boundaries glass imposes. Students will use innovative approaches to design and
combine multiple advanced techniques to construct original sculptural art.
You’ll enjoy: the one-on-one instruction, making large scale projects, the well-equipped classroom, and the intimate class size.
Its hard-core fusing in a nurturing,
relaxed environment.
You'll love the concentrated,
in-depth study and creative momentum you’ll gain while actively producing
nonstop, for four consecutive days.
You’ll leave class with a working
knowledge of kiln operation, custom project specific firing guides and the
inspiration you’ve been craving to go sculptural!


Learn at home at your own pace. Instructional
Videos are here!
Available here: http://www.lisavogt.net/shop.aspx?id=40

Check out my writer’s blog.