 |
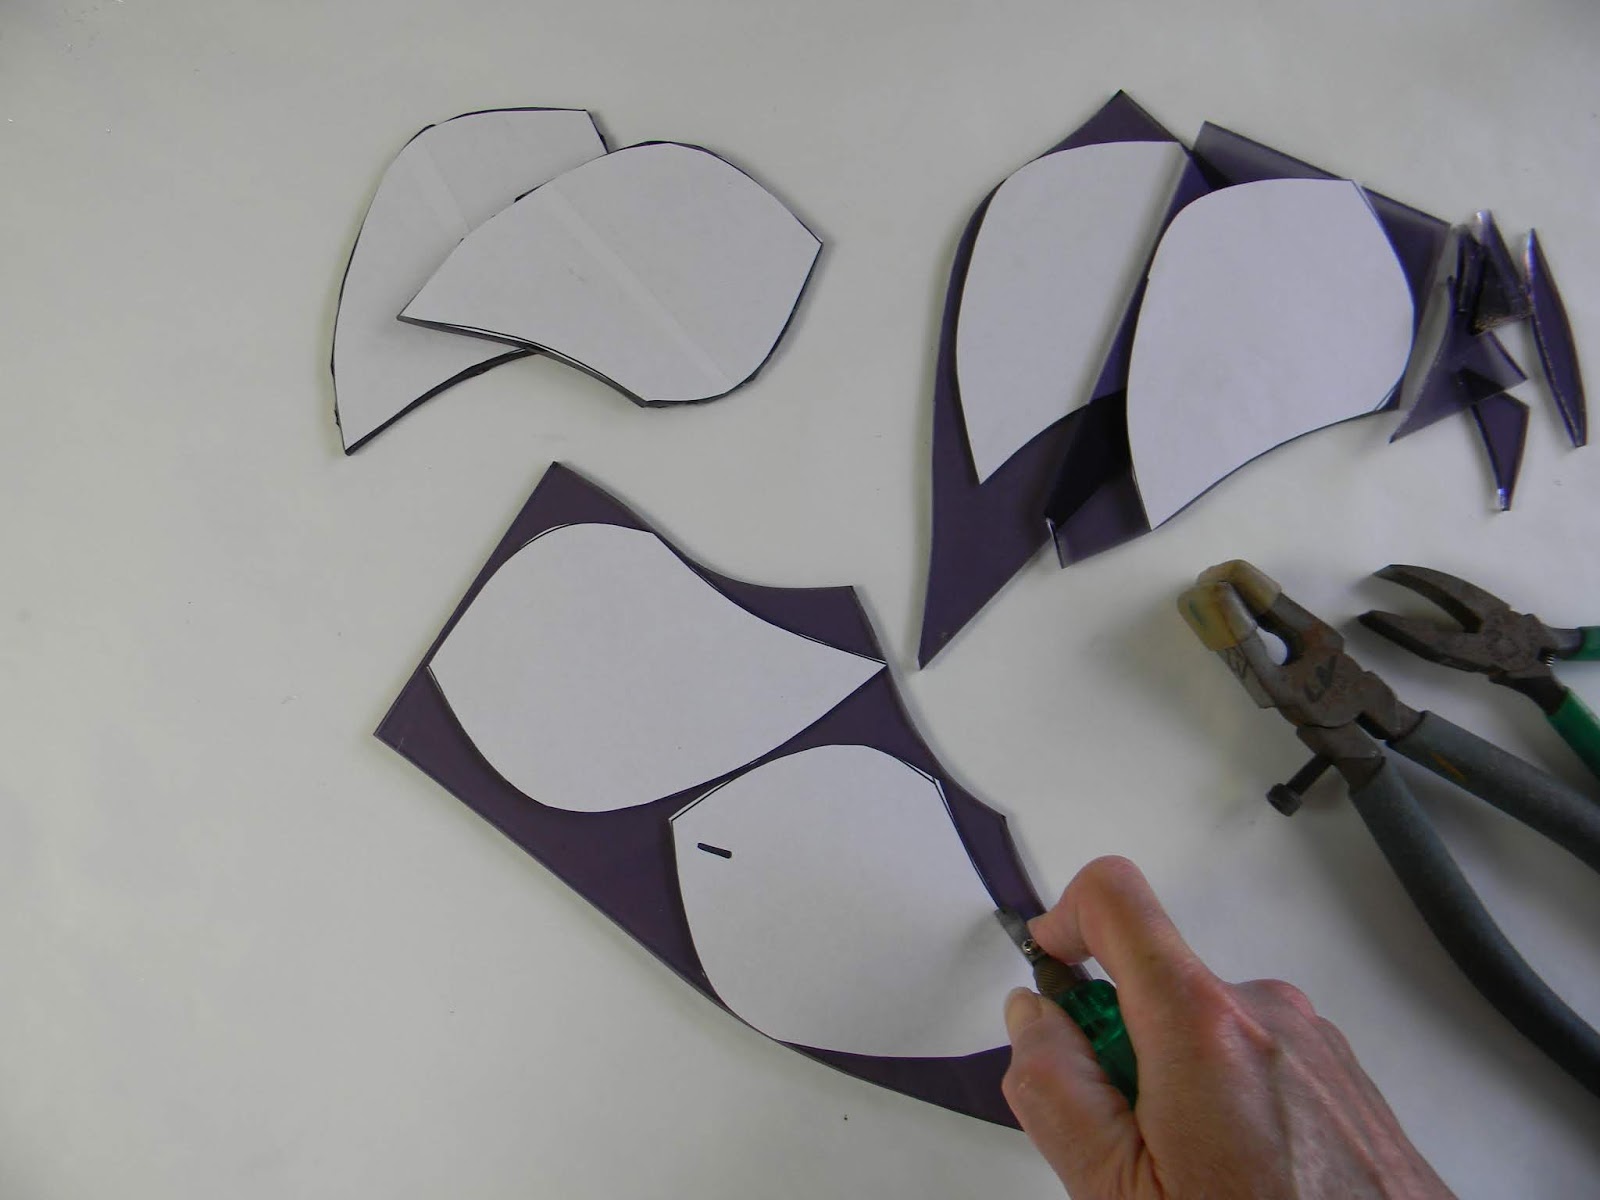
| Grape Tulip from Creative Shapes Video |
Having made glass art for over 30 years I sometimes take
for granted the tiny details, and small steps I take on a regular basis to ensure
the consistent durability and beauty of my finished pieces of art.
These
time-tested routine practices may seem insignificant, but the steady use of
these reliable techniques has incredible value.
At every stage of artistic growth, whether you’re a
beginner or an advanced glass fuser, it’s beneficial to review the basics on
occasion to enjoy continued success. You’ll find that as you seek out more
advanced projects, these simple, tried-and-true methods are often the keys to
consistent, positive results.
Plus, they increase your control of the medium which
inspires future growth.

Years-ago there were an abundance of local glass shops with
open door policies. These family run stores welcomed visitors and questions
from curious crafters hungry to learn and eager to improve their techniques. The
one-on-one interaction was priceless. A willing student could learn and advance
their understanding of the medium rapidly simply by watching a master craftsman
at work. You’d see firsthand the practical short cuts no one thought worth
writing down. You’d witness the artist’s slow patience and their pride in
taking their time to do a good job. You’d pick up on their subtle, sometimes
unconventional little tricks that made their work better, tighter and more
cohesive.
But now we’re limited to gaining knowledge through what’s
shared and what’s showy. But it’s not necessarily what’s really valuable to
gaining ground on your own. A lot of this information has mid-range value
rather than benefits for beginner or advanced fusers.
In my experience, we
learn more from fundamental, time-tested practices that hover on the fringes,
rather than sail in the mainstream. With the help of these little treasures, you
can adapt your methods and confidently pursue new techniques to advance your skills
and the quality of your work.
Here are some basic glass handling techniques I use that ensure
my success.

Thoroughly
clean the sheet glass before cutting it.
I use plain water, a sponge and paper towels. I use a
single edge razor blade to remove labels and any residual glue that might be
left behind. You tend to do a better job cleaning the glass when its whole
because it’s easier to wash one piece rather than a bunch of cut pieces.
Thoroughly wash off any dusty residue from the grinder or
oil from the glass cutter. These contaminates can sometimes leave an
unattractive haze on the fused glass.
I clean the glass with plain water again after cutting it
to size and before assembling the project. Then I handle the cut glass by the
edges to minimize any finger prints which can burn into the fused glass leaving
a dull finish.
Remove
any marking pen from the cut glass before assembling the project.
I don’t assume the pen marks will burn off during firing. I
take the extra time to make sure the glass is in the best condition before I
fuse or slump the glass. I use water and sponge or a single edge razor blade to
remove the pen marks.

Use
the smallest amount of fuser’s glue possible.
Avoid using glue if possible. But if you must, apply a
pin-head size dot of glue to the glass with the tiny tip of a toothpick, or
similar tool. This small amount burns off without leaving any gray haze between
layers.
Get creative. When making a project with a border I only
glue the outside edge pieces down to the base glass. When the glue dries, the
glued border holds the interior pieces in place long enough to transport the
assembled project to the kiln shelf.
Avoid using glue on clear dichroic glass or iridized glass
if the coating will be placed face down. The glue leaves a distracting, “water
spot” between layers. This spoiler can be avoided simply by stacking the
dichroic or iridized pieces on the project once it’s assemble inside the kiln.
Accuracy
matters.
Use a strip cutter for borders and strips. I cut several
more strips than I need and then pick the straightest, cleanest ones to use in
my project. This drastically increases the cleanliness of the finished art. I
use the extra strips in Free Flows, pot
melts or other freeform projects. Nothing goes to waste.

Avoid
grinding your glass if possible.
The process of grinding increases the surface area of the
glass. This can cause the ground glass to have a hazy edge after fusing. This
dull edge is a form of devitrification. You’ll have bright shinny edges if you
simply cut the glass to size and then assembly your project without grinding.
With that said, I don’t hesitate to grind my glass to
improve the shape and size if it will benefit the, “look” of the finished
project. Take flower petals for example. Grinding them makes the sizes uniform
and the shapes smooth. I wouldn’t hesitate to grind them to make the overall
piece better. I would also be sure to grind the entire outer edge of each
flower petal for a consistent appearance after fusing.

Do
your absolute best work on every step.
This tip goes back to my early stained glass days, but it’s
timeless. Do your best work on every single step. It makes the next step easier
and you’ll have more professional results guaranteed.
These simple ideas may seem trivial, and not worth
mentioning. But the combined effort truly makes a huge difference in the
quality and attractiveness of my work. You can benefit from my experience by
following these simple practices and you’ll enjoy increased consistency. You’ll
also learn to accurately predict and control the outcome of your fused glass
art. And when something goes wrong, you can eliminate what worked in the past
then go back, retrace your fabrication steps, materials and firing schedules to
pinpoint the cause of the problem.

Best of all, you can take that newfound knowledge and use
it to create all new works of art.
Wherever you are in your
artistic journey, you’re doing a great job! Keep going. Never settle. You are
an amazing talent. Shine on!
Happy fusing!
Lisa
Lisa
Follow my
blog for more tips and tricks!
Artist
Website www.LisaVogt.net
YouTube http://www.youtube.com/watch?v=dhOifd7wukk
Facebook www.Facebook.com/LisaJVogt
YouTube http://www.youtube.com/watch?v=dhOifd7wukk
Facebook www.Facebook.com/LisaJVogt
Author
Website https://lisajvogtcom.wordpress.com/
Twitter
https://twitter.com/lisajvogt
Upcoming
Webinar
Let’s get
together and fuse glass!
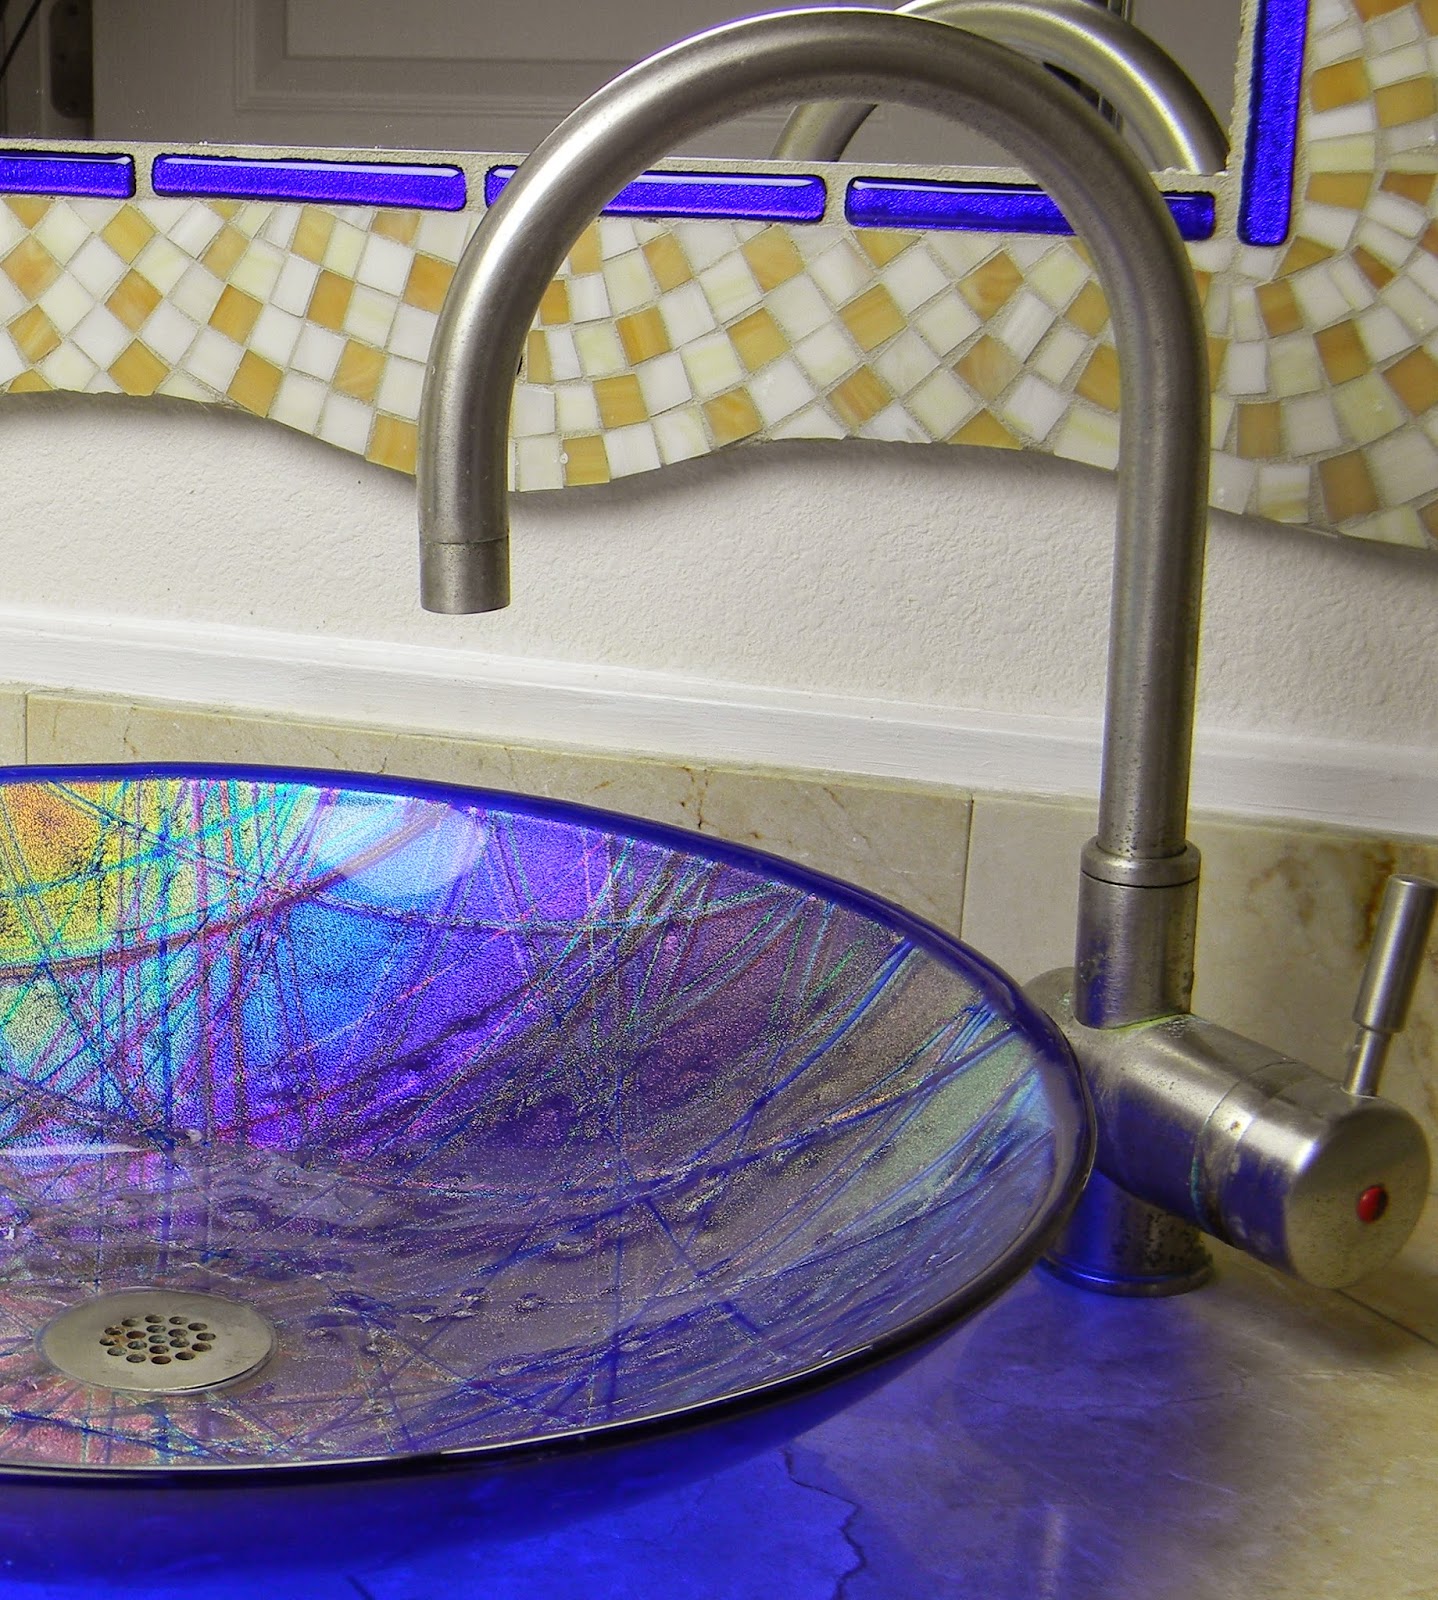
Make a Fused Glass Sink
May 14, 2019
In this
comprehensive Webinar, I’ll guide you step by step through the time-tested
processes I use to make large-scale, functional vessels.
You'll learn safe handling techniques for cutting oversized circles, how to fuse and slump thick pieces to retain consistent bowl height, plus trade-secrets for worry free drilling.
In addition to fabrication know-how, you'll receive a complete supply list, specifics on kiln requirements, source information for the slumping mold and drill kit, as well as helpful installation tips.
With all the professional tricks revealed, you'll gain the confidence and knowledge needed to make your own dazzling beauty.
Wait...there's more!
In addition, I’ll demonstrate how to make a glittering dichroic sink. I’ll also show you how to make a cast glass sink from nipped glass pieces, dichroic bits and frit. Plus, you'll be guided through the various cold-working steps I use to finish the cast glass sink edge to a glamorous, professional, quality polish.

Learn at home at your own pace. Instructional
Videos are here!
Available here: http://www.lisavogt.net/shop.aspx?id=40

Check out my writer’s blog.
Lisa, I really enjoy and appreciate your positive, upbeat, well-written blog tips. Thank you!
ReplyDeleteBarb
Lisa,
ReplyDeleteI took several of your classes when you had your glass store on Kennedy ave, I learned so much from you and am sorry that that opportunity isn't readily available. There were other glass shops that did give lessons I attended and also learned. Now they are gone too.
Thank God for your blogs. I also attended one of your webinars, so still can learn. You got a number of us started fusing glass.